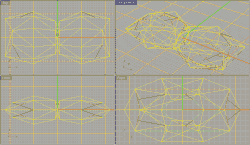
Ok, we've completed the actual creation process. Now what we need to do is prepare the model for conversion. Theoretically, it can be saved as a DXF right now, and it will work fine. But you would undoubtably come away with a lot more polygons than you'd expect or want.
When Rhino converts from surfaces to 3D Faces, some of the triangular surfaces get convereted in to more than one triangular 3D Face. So what we need to do is to perform the conversion, see what faces come out divided into more than one 3D Face, and then manually create a single 3D Face to replace the divided ones.
Let's begin. First of all, the turrets are already 3D faces, so we can hide the turret layers. Their boxes don't need to be converted, as they get deleted before the model reaches POF format, so we can hide their layers as well. What we are left with is the hull layer, so just click One Layer On and select to keep the turret layer.

Now, click on Select All. Then choose the Mesh from NURBS Object button. In the dialog box that pops up, click on Detailed Controls. In the new box, uncheck Refine, Jagged Seams and Weld. Check Simple Planes, and leave the rest of the settings alone. Click OK.

It should look something like the image on the left. The yellow lines are the still-selected surfaces, while the few black lines are the surfaces that got divided into two or more 3D Faces. Now what needs to be done requires some patience, so quit twitching and pay attention! :p
Turn "Snap" off and OnSnap End on.
One you've gone over the whole model, replacing the divided faces with whole ones, unselect everything and click on Select All Surfaces. Make sure you get Select All Surfaces and not Select All Meshes. Save a temporary copy at this point just to be safe. Then cut the surfaces - yes, the standard "Cut" button.
Now what you should be left with is the hull, with each divided 3D Face having another 3D Face that you created in the same position. So find all those divided faces, click on the line that divides them to be sure you select the right face, and delete them.
The reason we cut the surfaces out of the scene as opposed to deleting them is because of Rhino's limitation of not snapping to 3D Faces, only surfaces. If you had missed replacing a divided 3D Face with a whole one, you would need to have the surfaces there to place a 3D Face in position. So why did we save anyway? Well, have you ever heard of power outages?
Now turn on all the layers with (what else?) the All Layers On button. Drag a selection box around the whole kit 'n kaboodle and see how many polysurfaces and polygon meshes you have up top. You should have 4 polysurfaces (the boxes) and 160 polygon meshes (if you followed everything exactly). If you have anything of any other kind, you should find and delete it before we convert it into DXF. If you forgot a polyline somewhere, for example, just click on Select All Polylines and delete them.
All ready? Go up to the File menu and choose "Save As...". In the "Save as type" drop-down box, pick "AutoCAD DXF (*.dxf)". Choose a name and click Ok. A dialog box will pop-up, with all sorts of AutoCAD Export Options. I have not messed with these settings myself, and the default settings have worked for me. So choose the following if yours is any different: Meshes, Polylines, Polyface meshes, Release 14, Use simple entities. Click Ok once more, and once more you will be presented with the "Polygon Mesh Options" dialog box. Do the same as before: "Detailed Controls", and pick only "Simple Planes". Click yet again on Ok and you should have a DXF version of the model wherever it was you saved it to.
Now we can close down Rhino and open up TS5. :D