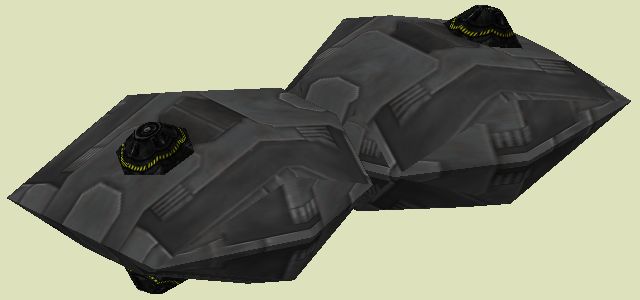
This is the model we will be creating. It is a simple model of a Flak-armed Gun Platform.
To begin, when you build your model in Rhino, you should always use polylines to define the general shape. If you want, you can use polylines to outline each and every surface on your model, although that can be a bit overkill.
Make sure that "Snap" in the status bar at bottom is activated (black). This will constrain the points of the polylines to the grid, which helps prevent non-solid models, a FS2 no-no.
 Let's create the basic skeleton of our model. Use the polyline tool to create the following skeleton:
Try and create it as exactly as possible - including the mistake (more about that on the next page). If you can't get it right, you can download it here, but the pratice will be good for you.
Use all four views to position the line points in 3D space. The result should be something that resembles an hourglass laying on it's side and flattened a bit, with tapered ends.