Now comes the fun part. And no, I'm not being sarcastic. Making and positioning turrets in Rhino is so easy (once you know how to do it) that other programs might just make you cry. Let's get to it.
I'm going to make this gun platform for bomb defense, so we'll be loading it up with 4 flak turrets.We'll make one turret, with special preparations for the Auto-Turret feature of Kazan's POF CS.
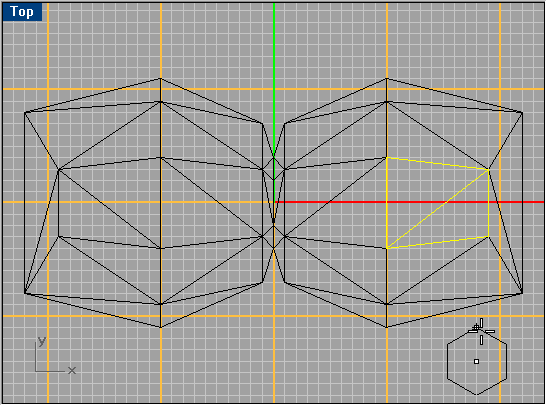
Let's begin with a hexagon. First of all, change the current layer so that whatever you create from now on is a seperate layer from the hull. This can be done later on as well, but there's no reason not to plan ahead. Call the new layer turret01, which is what it needs to be named in TS for the converesion. Click on the Polygon: Center, Radius button over on the left. Now look up to the command line, below the menus. See how it's asking for the center of the polygon, with some other stuff in parentheses? Notice the NumSides=4 part - that would make a square. We want 6 sides, so type 6 on the keyboard and press enter. You'll notice that the number has changed from 4 to 6. Now click away from our model - yes, away - and then drag until the outline of the hexagon is the right size for the base of our turret. We want the turret to fit on the surface that's highlited in yellow in the screenshot, so don't make it too big. A radius of 2 or 3 gridlines should do it. Click again to create the base for our turret.
We want the turret to be a bit thicker than zero, so we need to make another hexagon a bit above this one, and smaller. Remember the CTRL-click trick to place a point in all three dimensions? Make use of it here.
Select the Polygon tool again, and place a smaller hexagon a bit above the big hexagon. Give the small one a radius of 1, and place it 2 grid lines above the large one. This will eventually give us a fairly pointy turret, but that's ok, since it's going to be a flak turret.
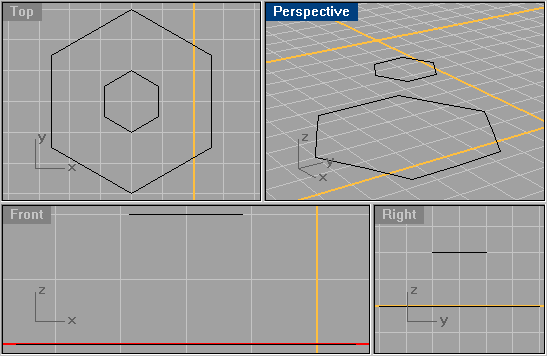
Now we need to concentrate on the hexagons without anything else cluttering up the screen. There's a number of ways to do it. You can select the hull and click on the Hide button, open up the Layers palette and turn the hull layer off, click on One Layer On and select the turret01 layer from the list, or click on One Layer Off and then select part of the hull. Any way you go about it, we now have a clear view of the 2 hexagons. Focus on them in all views by right-clicking on the Zoom Extents button to get Zoom Extents All Views.
We're going to be working in the Perspective view, so you may want to double-click on "Perspective" in the view's corner to maximize it. Double-click again to restore.